
How to teach alphabets to kids at home: a step-by-step guide
Most of us learnt the alphabet by chanting "A for apple, B for ball" until it stuck. It works for memorising a song. It does not work nearly as well for recognising letters, knowing their sounds and writing them — which is what a child actually needs for reading.
The good news is that teaching alphabets to kids at home takes no special training and very little money. What it does need is the right order: recognition before writing, sounds alongside names, and a few minutes every day instead of an hour on Sunday. This guide walks you through that order step by step, for children aged two to six.
On this page
1. When should a child start learning alphabets?
There is no single right age, but there is a sensible progression. Children move from hearing letters, to recognising them, to writing them, and each stage has its own time.
- 2 to 3 years (playgroup): Hearing alphabet songs and rhymes, looking at picture books, pointing at letters on signs. No pressure to name letters yet.
- 3 to 4 years (nursery): Recognising some capital letters, especially the first letter of their own name. Starting to link a few letters with their sounds.
- 4 to 5 years (LKG): Knowing most capital letters and many small letters by sight and sound. Tracing letters with a pencil.
- 5 to 6 years (UKG): Writing letters without dots, and putting sounds together to read simple three-letter words such as cat, sun and pen.
If your three year old knows only two or three letters, that is completely normal. What matters is steady exposure, not a race. Our guide to what a child should know before LKG explains what schools really expect.
2. Letter names or letter sounds first?
Every letter has a name (the letter B is called "bee") and a sound (it makes the sound "b", as at the start of "ball"). For reading, the sound is what matters. A child who knows that C, A and T say "c", "a", "t" can blend them into "cat". A child who only knows "see, ay, tee" cannot.
You do not have to choose one over the other. The simplest approach is to teach both together, and lean on the sound: "This is B. B says b, like ball and bus." Many Indian schools now use phonics in nursery and LKG, so teaching sounds at home also keeps you in step with the classroom.
3. Which order to teach the letters
Almost everyone starts at A and goes to Z, because that is the order of the song. It is not the easiest order for a child to learn, though. Three better approaches:
Start with the letters in your child's name
A child's own name is the most interesting word in the world to them. Begin with its first letter, then the others. Point it out everywhere — on their school bag, on a birthday card, on a shop sign.
Group letters by shape for writing
When it is time to write, teach letters that share strokes together. This follows how a child's hand develops:
- Straight lines only: L, T, I, E, F, H
- Straight and slanting lines: A, K, M, N, V, W, X, Y, Z
- Curves: C, O, Q, G, S
- Straight lines and curves: D, P, B, R, J, U
A child who can draw a standing line and a sleeping line can already write L and T. That early success is hugely motivating.
Capitals first, then small letters
Capital letters are made mostly of straight lines and are easier to tell apart. Small letters (lowercase) have more curves and look similar to each other — b, d, p and q are all the same shape turned around. Most children learn capitals in nursery and small letters in LKG. Since most printed words use small letters, introduce them as soon as your child is comfortable with capitals.
4. How to teach alphabets to kids: 8 steps
Step 1: Surround them with letters
Put an alphabet chart at your child's eye level, read picture books every day, and point to letters naturally: "Look, that sign starts with M, like Mumma." Children absorb a lot before any formal teaching begins.
Step 2: Teach one or two letters a week
Resist the urge to teach five letters on Monday. One or two new letters a week, revisited every day, sticks far better. Twenty-six letters at two a week is about three months — a comfortable pace for a four year old.
Step 3: Connect each letter to a picture and a sound
For every letter, choose one clear picture your child already knows: A for apple, B for ball, C for cat. Say the sound, show the picture, and let your child find two more things around the house that start with the same sound.
Step 4: Make it physical
Young children learn best through their hands and bodies. Trace letters in sand or rice on a plate, make them with dough, walk along a big letter drawn in chalk, or form them with your bodies. This multi-sensory practice builds memory much faster than looking at a page.
Step 5: Build pencil control before letters
Writing a letter needs strokes a child can already make. Practise standing lines, sleeping lines, slanting lines, curves and circles first. If holding the pencil itself is still a struggle, start with our guide on how to teach a child to hold a pencil.
Step 6: Trace, then copy, then write alone
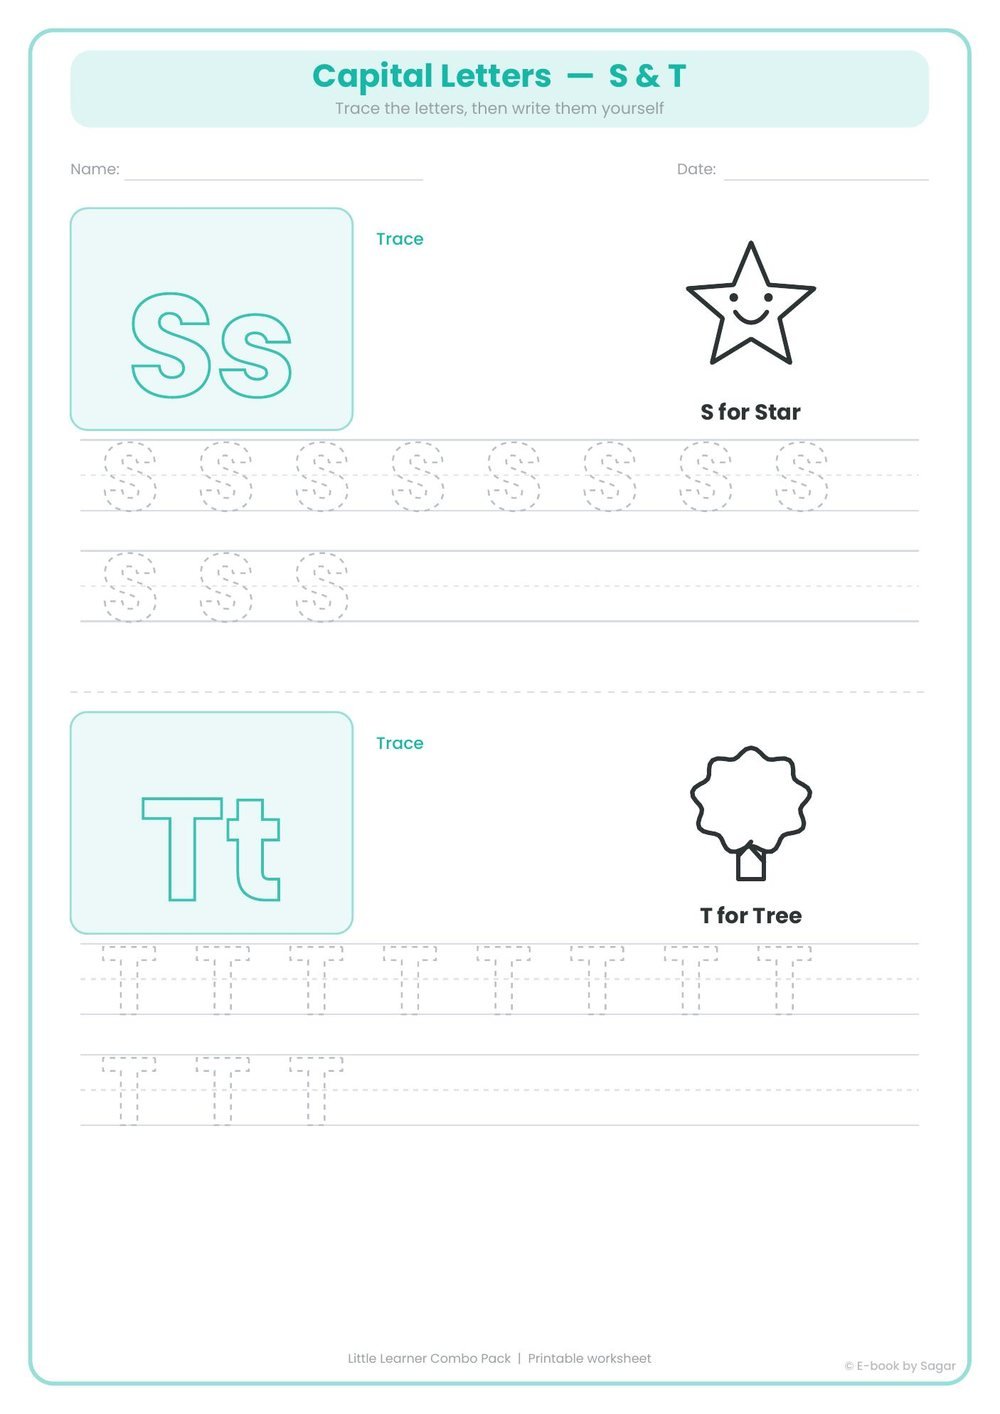
Alphabet tracing worksheets bridge the gap between recognising and writing. Start with large dotted letters, move to smaller ones, then to copying a letter from a model, and finally writing it from memory. Each stage should feel easy before you move on.
Step 7: Review little and often
Flashcards are ideal for two-minute reviews. Hold up a card, ask for the sound, and celebrate a right answer. Mix three letters your child knows well with one new one, so every session feels successful.
Step 8: Start blending sounds into words
Once your child knows a handful of letter sounds (s, a, t, p, i, n is a popular first set), start blending: "s – a – t, sat!" This is the moment the alphabet stops being a song and becomes reading.
5. 12 alphabet activities for kids at home
These use things you already have, and each takes five to ten minutes.
- Letter hunt: Hide flashcards around a room and ask your child to find the letter B.
- Sound basket: Collect objects that start with the same sound — ball, book, banana, bangle.
- Rice tray writing: Spread rice or salt on a plate and trace letters with a finger.
- Dough letters: Roll dough into snakes and shape them into letters.
- Letter of the day: Pick one letter at breakfast and spot it all day.
- I spy: "I spy something that starts with m." Great for car journeys.
- Colour by letter: Colour every box with an A in red, every B in blue.
- Newspaper circle: Give your child an old newspaper and ask them to circle every T.
- Magnetic letters on the fridge: Spell their name and let them copy it.
- Body letters: Make an X with arms and legs, a C by bending sideways.
- Alphabet walk: Look for letters on shop boards and number plates.
- Letter matching: Match capital A to small a using two sets of flashcards.
Rotate these through the week so every session feels a little different, even though the letters are the same.
6. Moving from recognising to writing
Knowing a letter by sight and writing it are two different skills, and the second takes longer. A good progression for writing practice at home:
| Stage | What it looks like | Typical age |
|---|---|---|
| 1. Pre-writing strokes | Lines, curves, zig-zags, circles | 2–3 years |
| 2. Large letter tracing | Big dotted capitals with a picture | 3–4 years |
| 3. Small letter tracing | Dotted lowercase letters a–z | 4–5 years |
| 4. Copying | Writing a letter next to a model | 4–5 years |
| 5. Independent writing | Letters and short words from memory | 5–6 years |
Show your child where each letter starts and which way the pencil moves. Most letters start at the top. Getting this right early prevents awkward habits that are hard to correct later. For more on matching worksheets to age, see worksheets for 2, 3, 4 and 5 year olds.
7. A simple weekly plan
Here is how one week might look while you are teaching two new letters. Each session is ten to fifteen minutes.
| Day | Activity |
|---|---|
| Monday | Introduce letter 1: picture, sound, find objects at home |
| Tuesday | Rice tray or dough letters, then one tracing sheet |
| Wednesday | Introduce letter 2 the same way |
| Thursday | Tracing sheet for letter 2, flashcard review of both |
| Friday | Letter hunt or colour by letter using both letters |
| Weekend | Spot the letters outdoors; read a picture book together |
Keep a quick flashcard review of all earlier letters running every day. Two minutes is enough.
8. Common mistakes to avoid
- Teaching only the ABC song. A child can sing it perfectly and still not recognise a single letter. Always pair the song with the written letters.
- Going too fast. Adding new letters before the old ones are secure leads to confusion. Slow down when your child starts mixing them up.
- Starting with writing. Asking a three year old to write letters before they can draw lines and circles causes frustration. Recognition and strokes come first.
- Long sessions. Thirty minutes of alphabet practice ends in tears. Ten minutes, every day, works far better.
- Correcting every letter. Show the right way once, then praise effort. Constant correction makes children avoid the pencil.
- Worrying about reversals. Writing b for d, or a backwards S, is normal until around age seven. It usually fixes itself with practice.
9. Questions parents ask
What is the best age to teach alphabets to a child?
Most children are ready to start recognising letters between three and four years old, in nursery. Before that, alphabet songs, rhymes and picture books build a useful foundation. Writing letters usually begins between four and five.
Should I teach capital or small letters first?
Capital letters first, because they are easier to write and tell apart. Introduce small letters once your child knows most capitals, since most words in books use small letters.
How can I teach alphabets to a child who is not interested?
Make it a game rather than a lesson. Use letter hunts, dough letters and the letters in their own name, keep sessions very short, and stop while your child is still enjoying it. Interest usually grows once they get a few letters right.
Are alphabet tracing worksheets useful?
Yes, once your child can hold a crayon with their fingers and draw basic lines. Tracing worksheets teach the correct shape and direction of each letter. Use them alongside hands-on activities, not instead of them.
My child confuses b and d. Should I worry?
No. Mixing up b, d, p and q is very common until around age seven. A simple trick is the word "bed": the b and the d make the two ends of a bed. If reversals continue well past seven, mention it to the class teacher.
Ready-made practice sheets, in the right order
The Little Learner Combo Pack has 150 printable worksheets for ages 2 to 6 — pre-writing strokes, alphabet and number tracing, colouring, early maths, flashcards and charts. Download once, print as often as you like.
See the worksheets pack — ₹49